How to Upload Gmail Backup File to New Account?
Summary: Today in this blog post we will discuss the secure way to upload Gmail backup file to new account without affecting the integrity of the email data. So for to know about the procedure, read the complete article.
You should back up your Gmail account for a variety of reasons, including You’d like a little extra protection in case someone hacks your account and takes it over; you’re about to lose your job and want to save everything you’ve done; you’d like a little extra protection in case someone hacks your account and takes it over; little extra protection in case someone hacks your account and takes it over; extra protection in case someone hacks your account and takes it over (or deletes it).
While most of us think that our Gmail accounts will remain operational eternally (since Google manages them, not us), having a backup of your emails is always a good idea. What’s the worst-case scenario? There will never be a need for backup. What is the most ideal situation? You’ll prevent a mental breakdown if disaster strikes. Your information will also be return to you.
Download Google Data
While Google does not provide native, seamless backups within the Gmail service, you may use a Google-provided approach to export an offline copy of your Gmail data to a local file. You may export all of your Google data using the Download your data option in Gmail’s account settings. The file is download in MBOX format using Gmail’s “Download your data” function. Although there is no direct way to import MBOX files into Gmail using Google account settings, there is a workaround.
The method to export the MBOX archive of Gmail data from your Google account may be found in the Google account settings area of the web interface. To access the administrator interface and get your Google account data, follow the steps below:
1. Sign in to your Google account first (Login to Gmail, etc)
2. After you’ve logged in, navigate to https://myaccount.google.com/.
3. From the drop-down option, choose Data & Personalization.
4. Select the option to save your data to your computer.
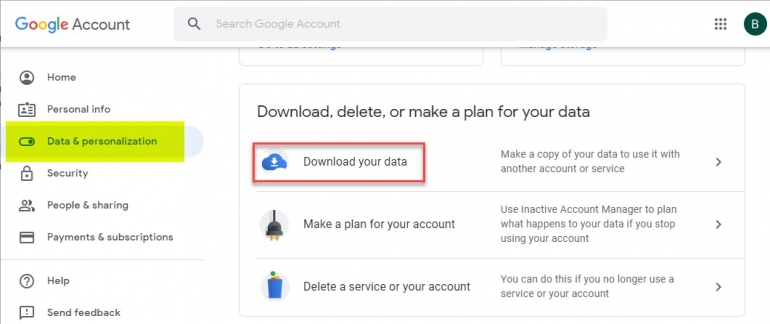
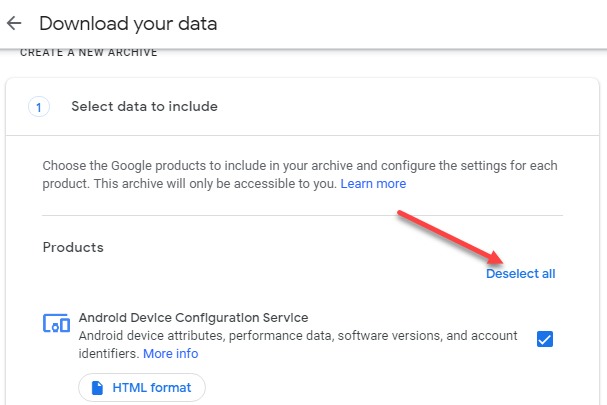
If you only want your Gmail data, select Deselect all at the top of the page, then scroll down to Mail and check the box.
There is just one MBOX format that is support by default when exporting Gmail. Also, by default, All Mail Data Include is selected. By checking this option, you can change the folders that is export (Drafts, Inbox, Junk E-mail, sent, etc)
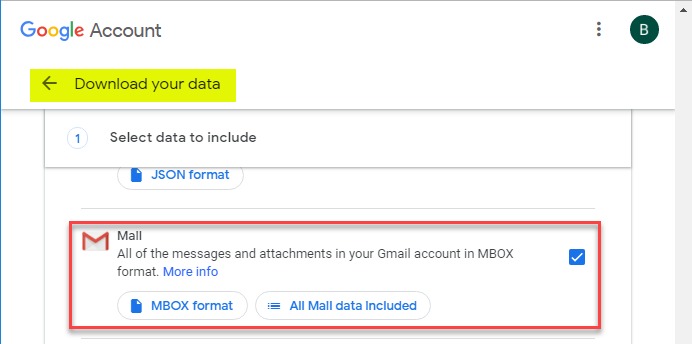
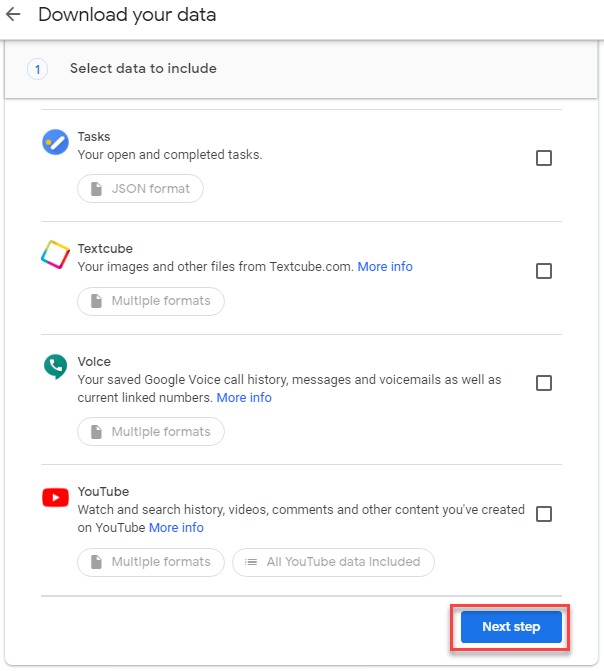
After selecting Mail and the folders you wish to export, go to the bottom of the page and select Next Step.
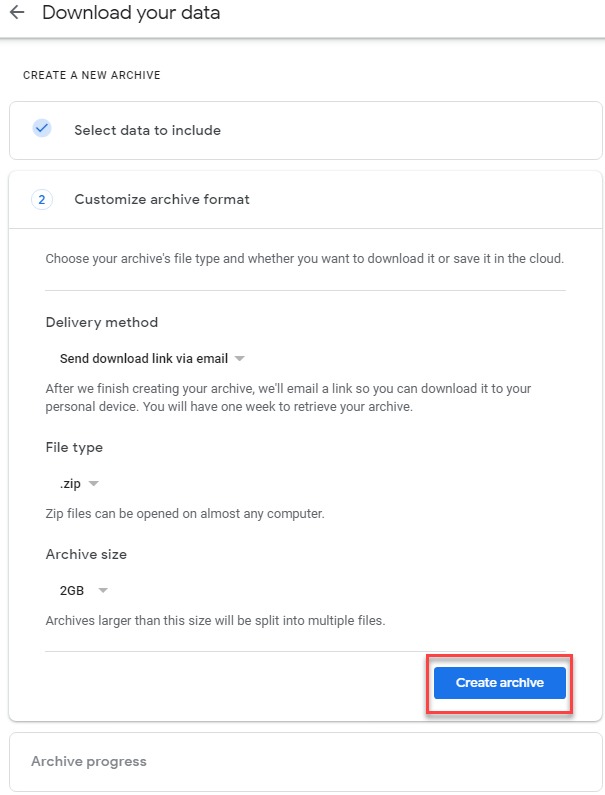
After clicking the Next Step button, you’ll be sent to the options for creating the archive. Two factors to consider are the file type and archive size. By default, the MBOX archive file will be produce within a.zip file, which will be available for download. The maximum size of an archive is 2 GB. When the archive files exced 2 GB, they are simply separated into many files.
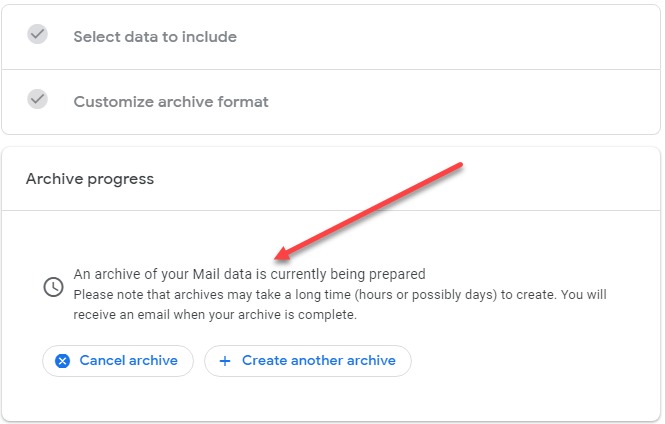
The Archive process starts when you confirm the selections here. You’ll see a warning that massive volumes of data might take hours, if not days, to produce, so keep that in mind.
Once the archive is complete, the archives will be available for download via the web interface.
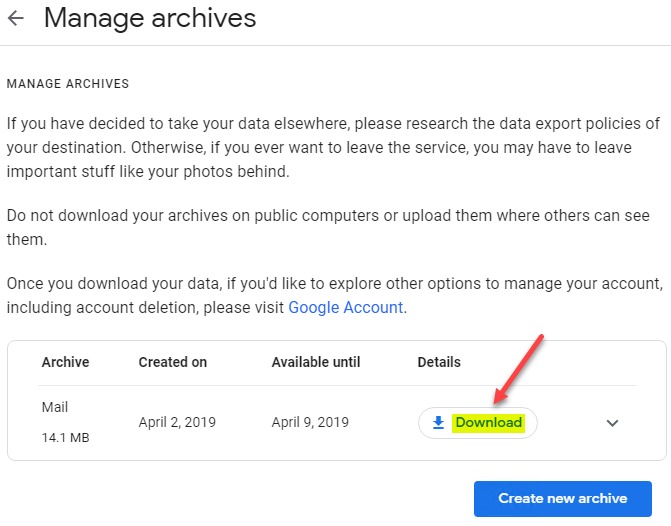
The MBOX file will be downloaded as a.zip archive using the Download link (s). Following the download and extraction, you should have the following folder structure:

Now you have your Gmail account archive file. After that, you can import Google Takeout to Gmail and export it to other file formats. Along with that, it can be transferable to cloud-based email servers and desktop-based applications.
Install Mozilla Thunderbird’s ImportExportTools Add-On.
You’ll need Mozilla Thunderbird and the ImportExportTools add-on to process the MBOX file after you’ve created, downloaded, and extracted it. You’ll be able to import MBOX to Gmail or extract them to a local disc using this method. Thunderbird may be download for free at https://www.thunderbird.net/en-US/download/.
Install the ImportExportTools add-on from Tools > Add-Ons after installing Thunderbird.
***Important Note*** Press the ALT key on your keyboard to bring up the Tools menu if it isn’t display. Once in the Add-Ons panel, click Extensions and search for the “ImportExportTools” add-on. Go here to install it in Thunderbird.
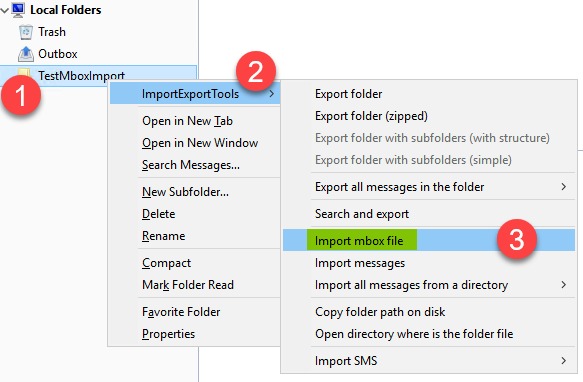
- Thunderbird will restart after the Add-On installation is complete. After Thunderbird has resumed, create a new folder in the Local Folders node. Below is a folder called “TestMboxImport” that has been create. From the context menu, choose ImportExportTools > Import mbox file.
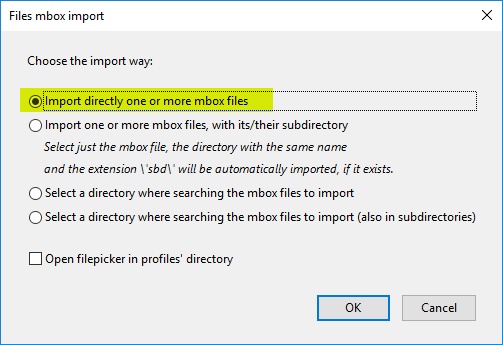
- The dialogue box Import Mbox Files displays. Here you may choose the method of import. Importing directly one or more MBOXfiles is the first option for importing directly to a folder. There are a few more approaches for dealing with MBOX file import that may be useful as well.
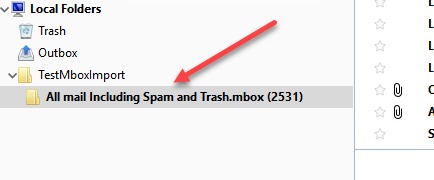
- Choose the MBOX file that was download and unzip from the location where it was extract. When you choose the downloaded and unpacked MBOX file, the emails from Gmail will show in your newly created folder.
Alternative Solution: To Upload the Gmail Backup File to New Account in a hassle-free way, use the MBOX converter. This tool easily transfers emails from MBOX file to Gmail Account in bulk that too with no data loss.
MBOX to Gmail Transfer
You may move MBOX files to Gmail or any other account you have access to using the same procedure. To Upload Gmail Backup File to New Account, you must first download the MBOX file from the source account, then connect Thunderbird to the new account into which you wish to import MBOX files. Simply drag and drop the MBOX file into a folder in your Gmail account, and your data will be successfully transfer or migrate!
Although you can also use the Google Takeout Converter to directly upload Gmail archive file to new account. It provides true, enterprise-ready backups for Gmail and other Google services, making moving and backing up your Gmail data significantly more efficient. Without the need for time-consuming techniques, email is automatically back-up, versioned, and instantly retrieved or transfer between accounts.
For Mre Such Article: Vist Here..


